
What is Wireguard?
WireGuard is an extremely simple yet fast and modern VPN that utilizes modern cryptography. It aims to be faster, simpler, leaner, and more useful than alternatives such as IPsec & OpenVPN.
WireGuard’s codebase has only 4,000 lines of code, which is considerably less than OpenVPN’s, which has 600,000.
WireGuard’s Performance
WireGuard’s speed and elegance are the main reasons for its popularity, it is significantly faster than OpenVPN & IPsec - in terms of raw throughput, authentication speed and latency.

Data from WireGuard.com
How WireGuard Works
At a fundamental level, WireGuard works by creating an interface and dictating some details such as:
- Your private key
- Your peer’s pub key
- Your peer’s endpoint & port
Some complex mathematical authentication happens, and you have a UDP tunnel which packets can traverse.
Ubiquiti EdgeRouter
Ubiquiti’s EdgeRouter lineup is a relatively inexpensive platform which provides a large range of features.
The EdgeRouter-X cost me £50, and has some enterprise grade features and dynamic routing protocols such as BGP, MPLS, OSPF, QoS, RIP, DNAT, SNAT, DPI, etc.
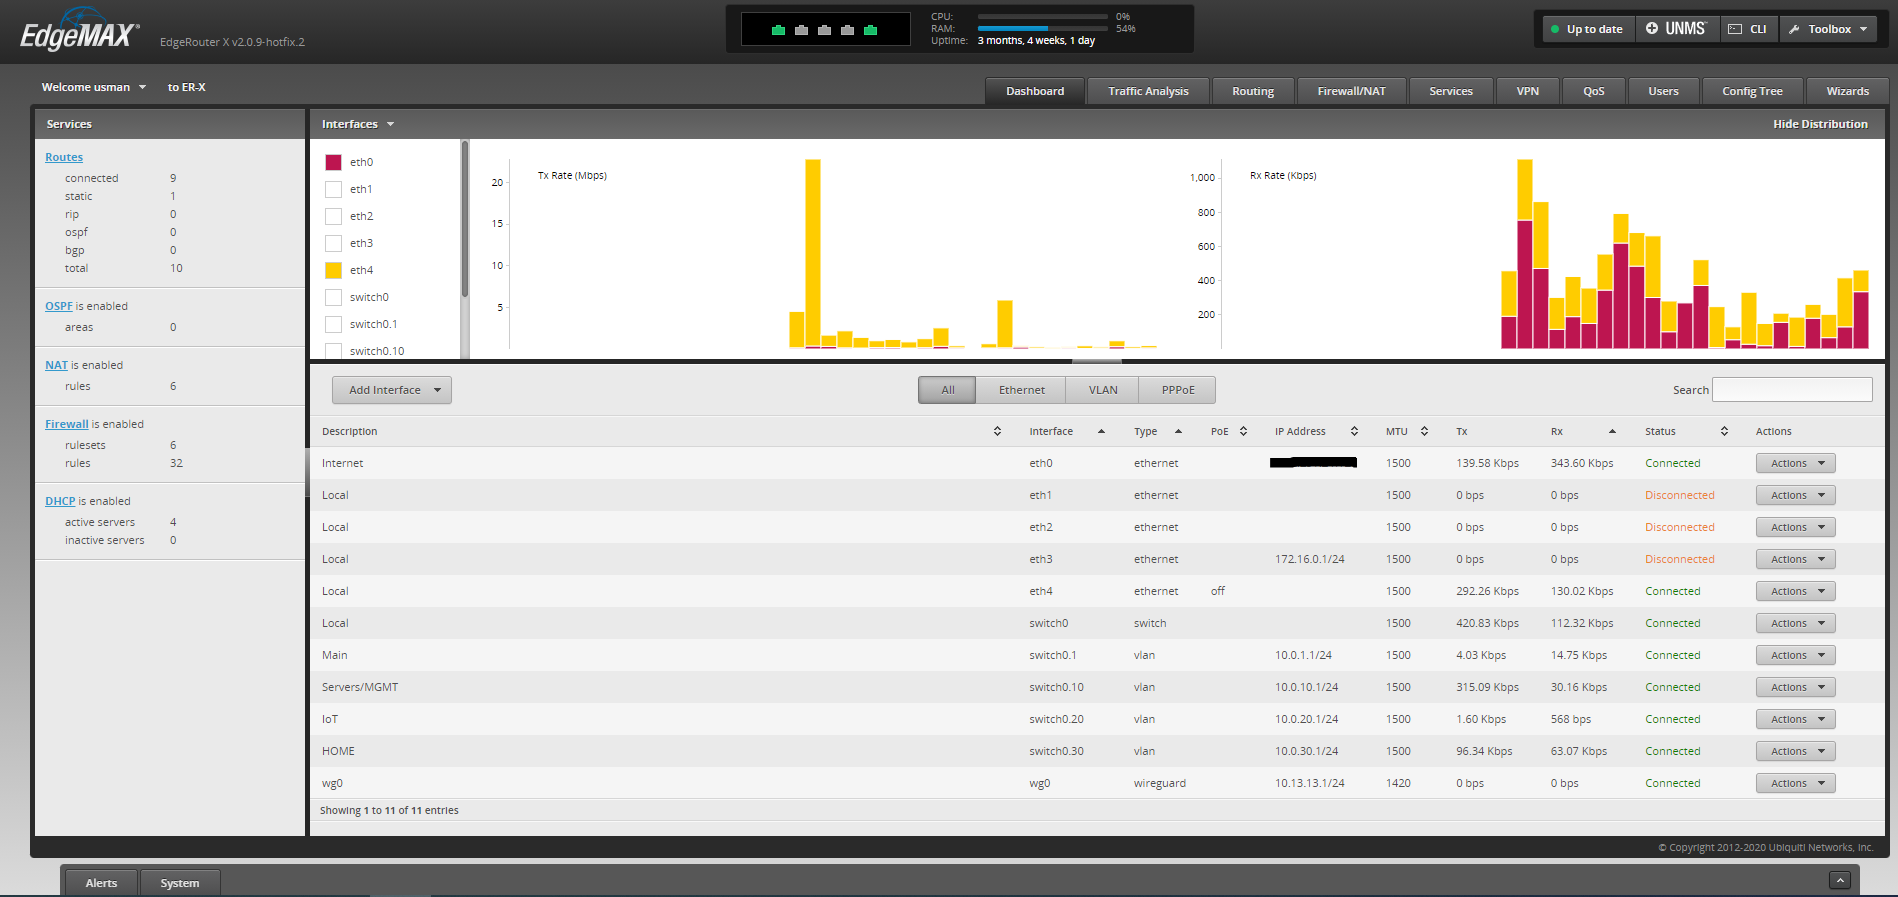
The EdgeRouter devices come with Ubiquiti’s Debian Linux based EdgeOS, which is a fork of Vyatta.
There is a Web UI for basic configuration, and a Juniper-style CLI for more advanced functions.
WireGuard Installation on ER-X
1. Download the .deb for your EdgeRouter variant and software version from the WireGuard github repository.
For example, on an ER-X with v2 software, use curl in this example:
user@ER-X:~$ curl -OL https://github.com/WireGuard/wireguard-vyatta-ubnt/releases/download/1.0.20210606-2/e50-v2-v1.0.20210606-v1.0.20210914.deb
You should then be able to see the .deb file in your home directory.
user@ER-X:~$ ls -la
total 176
drwxr-xr-x    4 user    users          800 Oct 20 11:12 .
drwxr-xr-x    1 root     root           288 Jun 23 20:41 ..
-rw-r--r--    1 user    users          220 May 15  2017 .bash_logout
-rw-r--r--    1 user    users          192 May 11 14:30 .bashrc
-rw-------    1 user    users          280 Oct 21 17:40 .history
-rw-r--r--    1 user    users          675 May 15  2017 .profile
drwxr-x---    2 user    users          304 Aug 16 18:28 .ssh
-rw-r--r--    1 user    users       153820 Oct 17 16:14 e50-v2-v1.0.20210606-v1.0.20210914.deb
Before installation, ensure you have the downloaded the correct fie for your Edgerouter variant and software version.
2. Install the .deb file.
To install the package, use the dpkg command.
$ sudo dpkg -i e50-v2-v1.0.20210606-v1.0.20210914.deb
3. To verify installation, Wireguard should appear in the show interfaces menu.
user@ER-X:~$ show interfaces wireguard
Possible completions:
  <Enter>               Execute the current command
  allowed-ips           Show wireguard interface allowed ips
  detail                Show detailed WireGuard interface information
  endpoints             Show wireguard interface endpoints
  fwmark                Show wireguard interface fwmark
  latest-handshakes     Show wireguard interface latest-handshakes
  listen-port           Show wireguard interface listen port
  peers                 Show wireguard interface peers
  persistent-keepalive  Show wireguard interface persistent keepalive
  preshared-keys        Show wireguard interface preshared keys
  private-key           Show wireguard interface private key
  public-key            Show wireguard interface public key
  transfer              Show wireguard interface transfer statistics
  wg0                   Show specified wireguard interface information
WireGuard Configuration on ER-X
1. Generating Server Key Pair
First we will need to generate a key pair for the wireguard server.
# Create a folder for the server's keys
user@ER-X:~$ mkdir server_keys

# Navigate to that dir
user@ER-X:~$ cd server_keys

# Currently in the server_keys directory
user@ER-X:~/server_keys$

# Generate the keys
user@ER-X:~/server_keys$ wg genkey | tee privatekey | wg pubkey > publickey

# ls command shows the generated keys
user@ER-X:~/server_keys$ ls
pubklickey privatekey

# Navigate back to the home directory
user@ER-X:~/server_keys$ cd ..

# Confirm this using pwd
user@ER-X:~$ pwd
/home/user
You can use the cat linux command to see the contents of the keyfile.
user@ER-X:~/server$ cat public
oUCXb+z4M6d0HCdJq2MB9WQLS8S1JsUYNM3vQTAkFmU=
2. Generating the my_phone Peer Key Pair
The peer key pair can be generated on any device, however it’s more convenient to store all the keys on the router.
# Create a folder for the peer's keys
user@ER-X:~$ mkdir my_phone

# Navigate to that dir
user@ER-X:~$ cd my_phone

# Generate a key pair for the my_phone peer, in the my_phone directory
user@ER-X:~/my_phone/$ wg genkey | tee privatekey | wg pubkey > publickey
You then should have two directories; one called server_keys and my_phone.
user@ER-X:~$ ls -la
drwxr-xr-x    4 user    users          800 Oct 20 11:12 .
drwxr-xr-x    1 root     root           288 Jun 23 20:41 ..
-rw-r--r--    1 user    users          220 May 15  2017 .bash_logout
-rw-r--r--    1 user    users          192 May 11 14:30 .bashrc
-rw-------    1 user    users          280 Oct 21 17:40 .history
-rw-r--r--    1 user    users          675 May 15  2017 .profile
drwxr-x---    2 user    users          304 Aug 16 18:28 .ssh
drwxr-x---    2 user    users          304 Aug 16 18:28 my_phone
drwxr-x---    2 user    users          304 Aug 16 18:28 server_keys
-rw-r--r--    1 user    users       153820 Oct 17 16:14 e50-v2-v1.0.20210606-v1.0.20210914.deb
3. wg0 Interface Configuration
# Enter configure mode
configure

# The location of the server's private key, previously generated
[edit]
user@ER-X$ set interfaces wireguard wg0 private-key /home/user/server/privatekey

# Creates the Gateway IP for the VPN and the subnet
# This subnet can be any private IP range, through check for conflicts
user@ER-X$ set interfaces wireguard wg0 address 10.6.69.1/24

# Creates entries in the route table for the VPN subnet
user@ER-X$ set interfaces wireguard wg0 route-allowed-ips true

# Port for WG (that peers will use)
user@ER-X$ set interfaces wireguard wg0 listen-port 51820

user@ER-X$ commit ; save
4. Adding peers to the wg0 Interface
# Remote User Peer
user@ER-X$ set interfaces wireguard wg0 peer /home/user/my_phone/pubkey
user@ER-X$ set interfaces wireguard wg0 peer /home/user/my_phone/pubkey allowed-ips 10.6.69.2/32

user@ER-X$ commit ; save
5. Poking a hole in the firewall for WireGuard
# Creates an accept rule in the WAN_LOCAL list (WAN_LOCAL - wan to router)
# Accepts all incoming UDP connections, from port 51820

user@ER-X$ set firewall name WAN_LOCAL rule 20 action accept
user@ER-X$ set firewall name WAN_LOCAL rule 20 protocol udp
user@ER-X$ set firewall name WAN_LOCAL rule 20 destination port 51820
user@ER-X$ set firewall name WAN_LOCAL rule 20 description 'WireGuard'

commit ; save
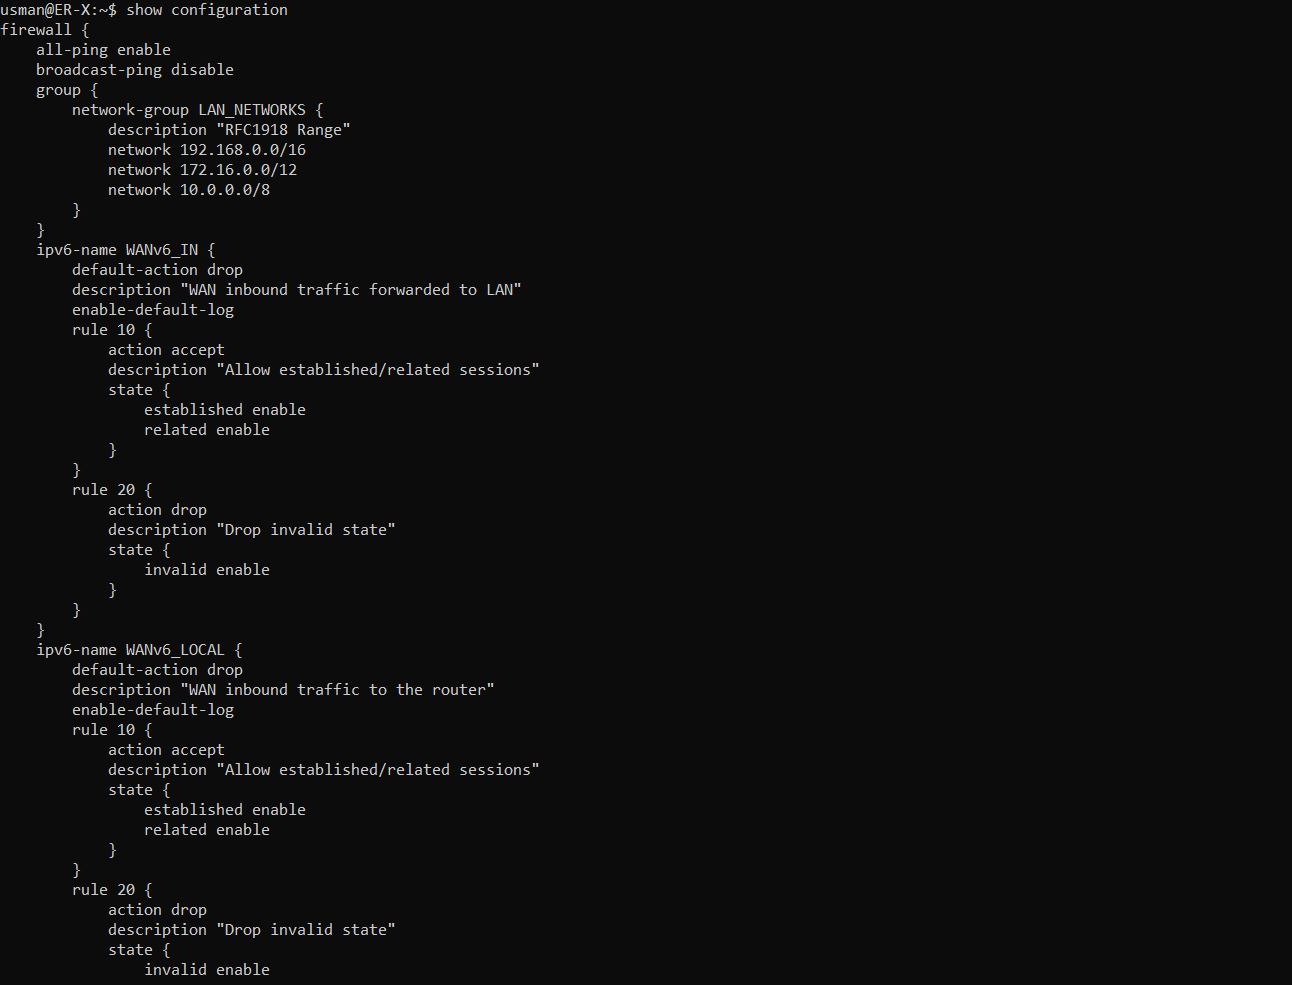
Once this is done, your wg0 interface and firewall configuration should look something like this.
user@ER-X$ show configuration

}
    }
    wireguard wg0 {
        address 10.6.69.1/24
        description WG_VPN
        listen-port 51820
        peer XzXsLlbdFDGzK10jFxySz3Qbk8ekY7YsASPAb+QprAc= {
            allowed-ips 10.6.69.2/32
            description my_phone
        }
        private-key ****************
        route-allowed-ips true
    }
}

        }
        rule 20 {
            action accept
            description WG_IN
            destination {
                port 51820
            }
            log enable
            protocol udp
            source {
            }
        }
6. Constructing the Config on the peer side
The peer side needs a few pieces of information to create the tunnel:
- The server’s public key
- The server’s endpoint (public IP address, or DNS record)
- The peer’s private key
- The peer’s IP address in the VPN subnet (the allowed IPs value set on the server)
Therefore, the previously generated my_phone private key AND the server’s public key, should be copied to the peer device.
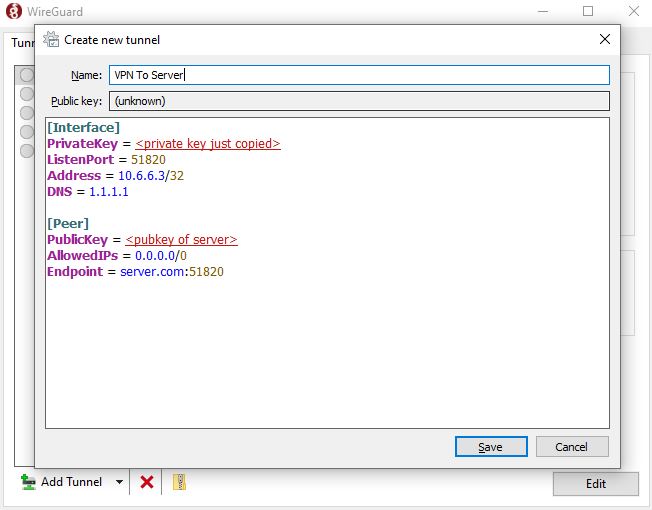
Create a file on the peer, with the file extension as .conf.
[Interface]
PrivateKey = <my_phone private key>
ListenPort = 51820
Address = 10.6.69.2/32                        # The allowed IPs value set on the server
DNS = 1.1.1.1                                 # Optional

[Peer]
PublicKey = <pubkey of server>
AllowedIPs = 0.0.0.0/0                       # Currently set as a wildcard to route all packets through VPN
Endpoint = server.com:51820                  # PubIP or DNS record of server
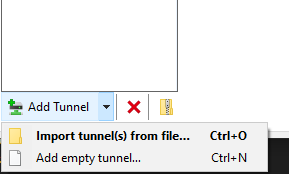
This can then be imported to the peer of your choice.
In the Windows peer, create a new tunnel and paste the config in.
7. You then should be able to connect to the VPN
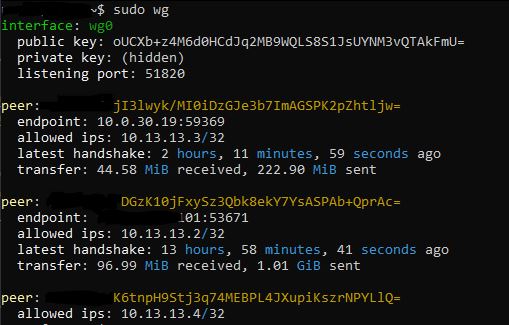
The latest handshake and transferred traffic metric can be a useful troubleshooting indicator.

More peers can be added by repeating the same steps (generating keys, allowing them in the wg0 interface and constructing the peer config).
Split Tunneling
Split tunneling is used to send traffic, only destined for a specific IP range, down the tunnel.
Split tunneling can be useful when you want to access devices on the other end of the VPN tunnel, but don’t want to tunnel all of your normal traffic (e.g. web browsing).
This can be achieved easily by changing the allowedIPs subnet of the peer side.
At the moment, it is set to a wildcard:
AllowedIPs = 0.0.0.0/0
But it can be modified, e.g. if you only want to route packets for a few specific subnets:
AllowedIPs = 10.0.10.0/24, 172.16.0.0/26
Diagnostics
The sudo wg command can be used to used to see diagnostic data, useful for troubleshooting.
Conclusion
Thats it! You should now have a working Wireguard VPN tunnel on your EdgeRouter.